New-Hire Guides
These guides are provided for new hires who are still waiting for access to Microsoft 365, so that they can begin entering time and completing onboarding paperwork.
Once you have gained access to Microsoft 365, please use the IT Knowledge Base to find additional guides.
Oracle Journeys Guide
Checklist Instructions
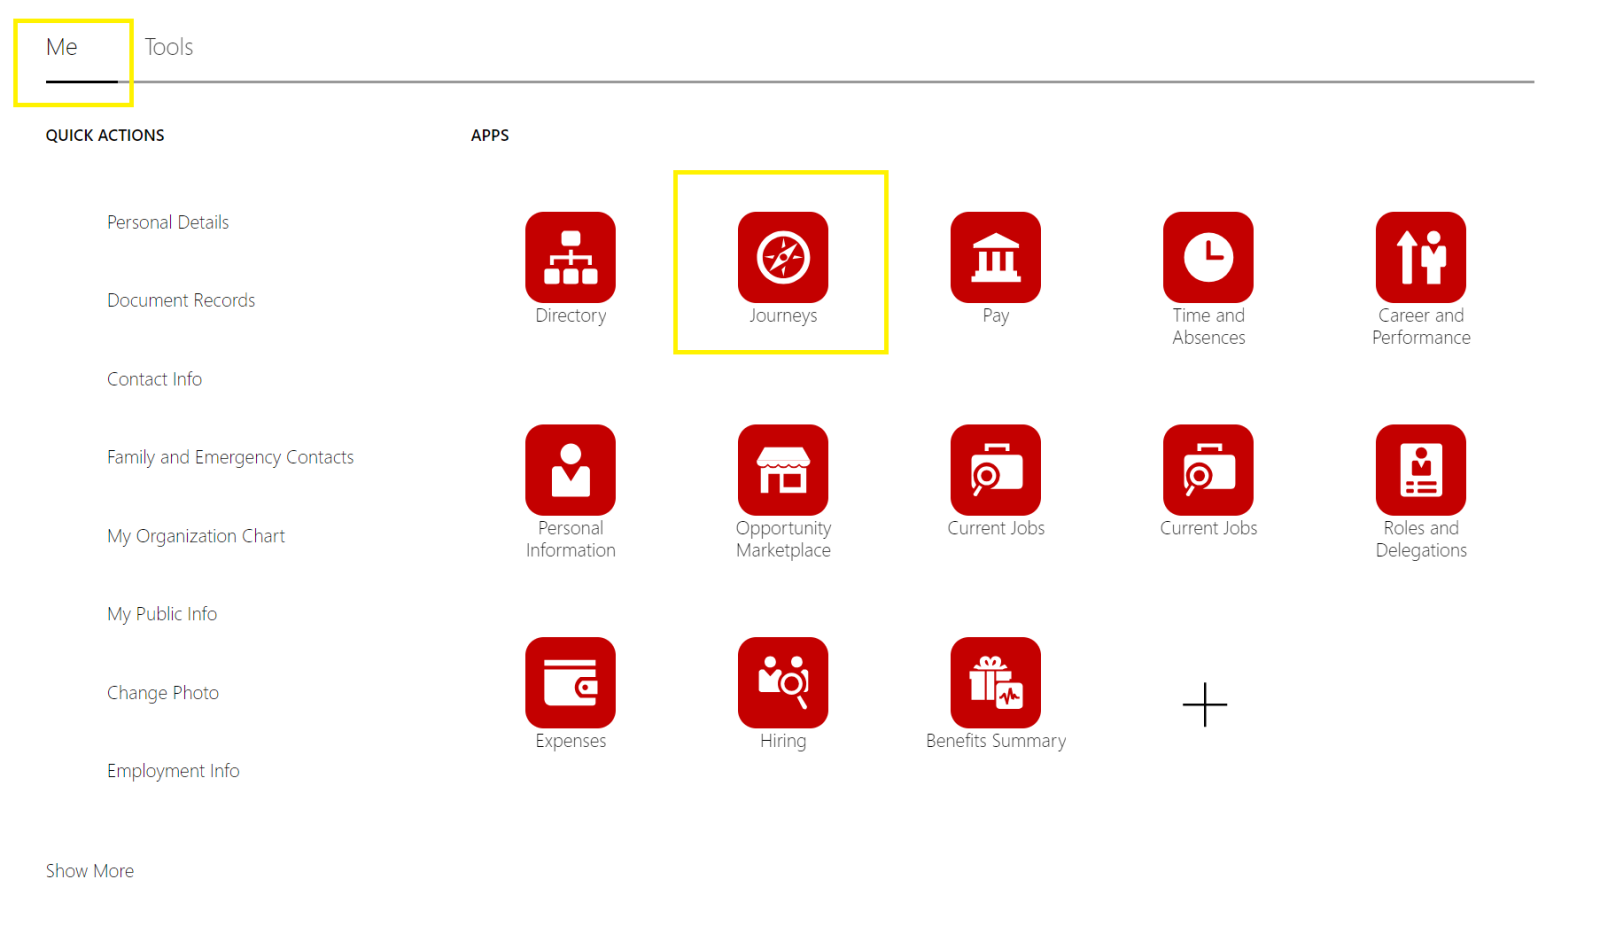
Log into your Oracle dashboard, and find the “Me” tab. Following this, find the red button that says “Journey”.
Depending on if you are Full time, Part time, or a Work study you may have a different checklist(s). There may be different requirements for each of the three regarding Pre/Onboarding tasks. You may also receive checklist(s) throughout your employment for various things asking you to complete specific tasks.
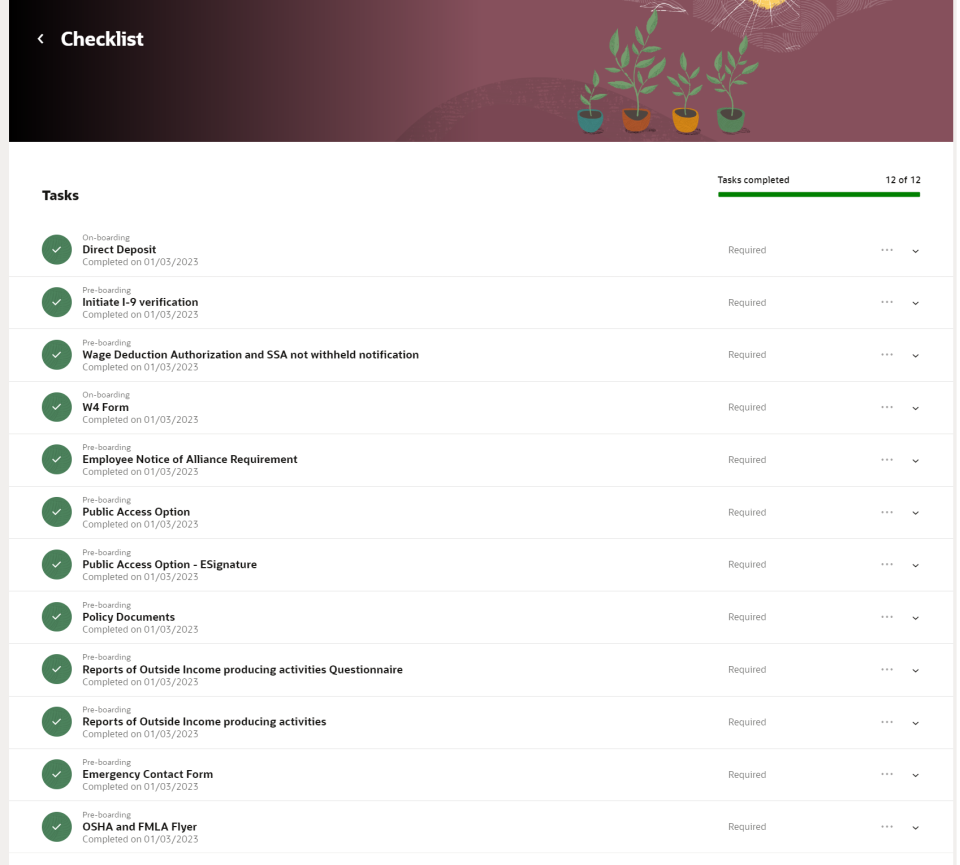
Examples of Checklists
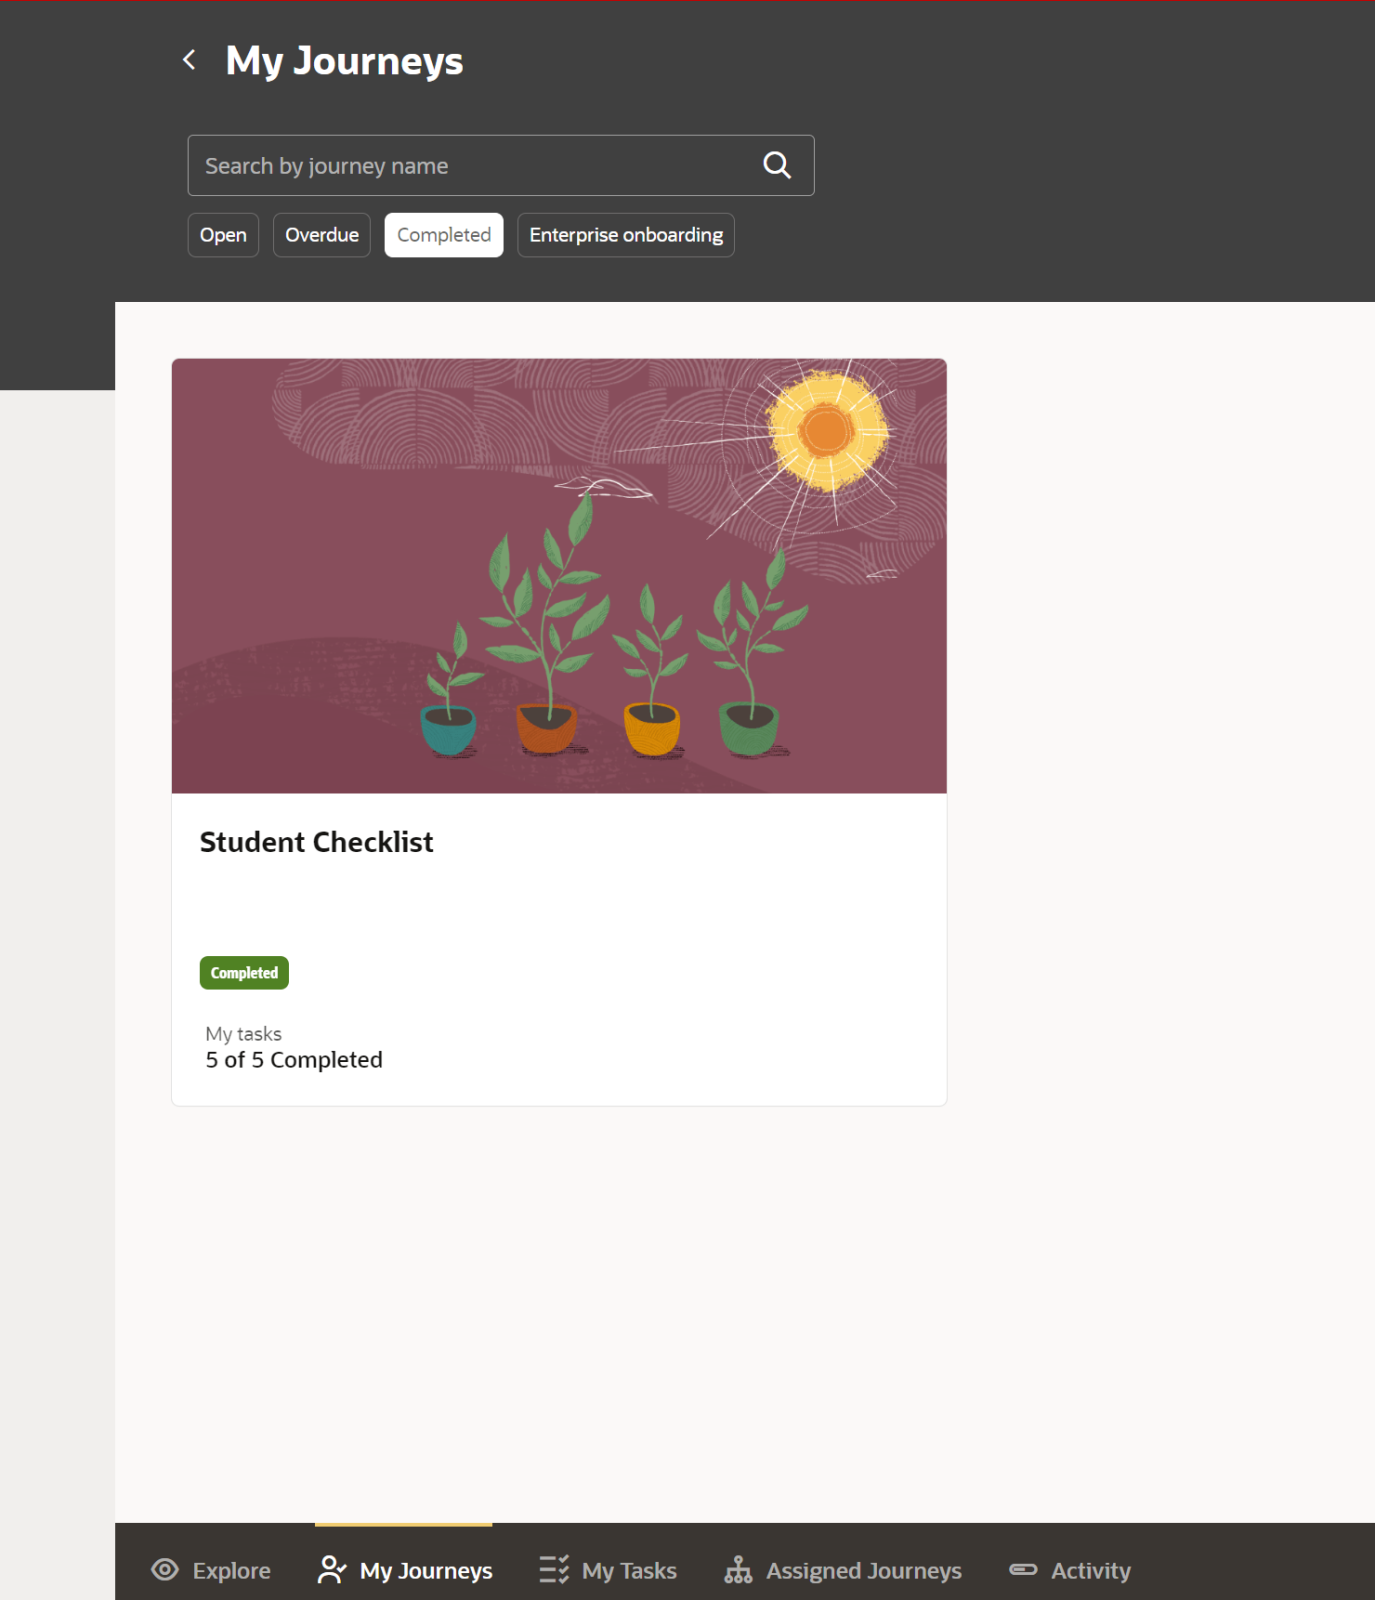
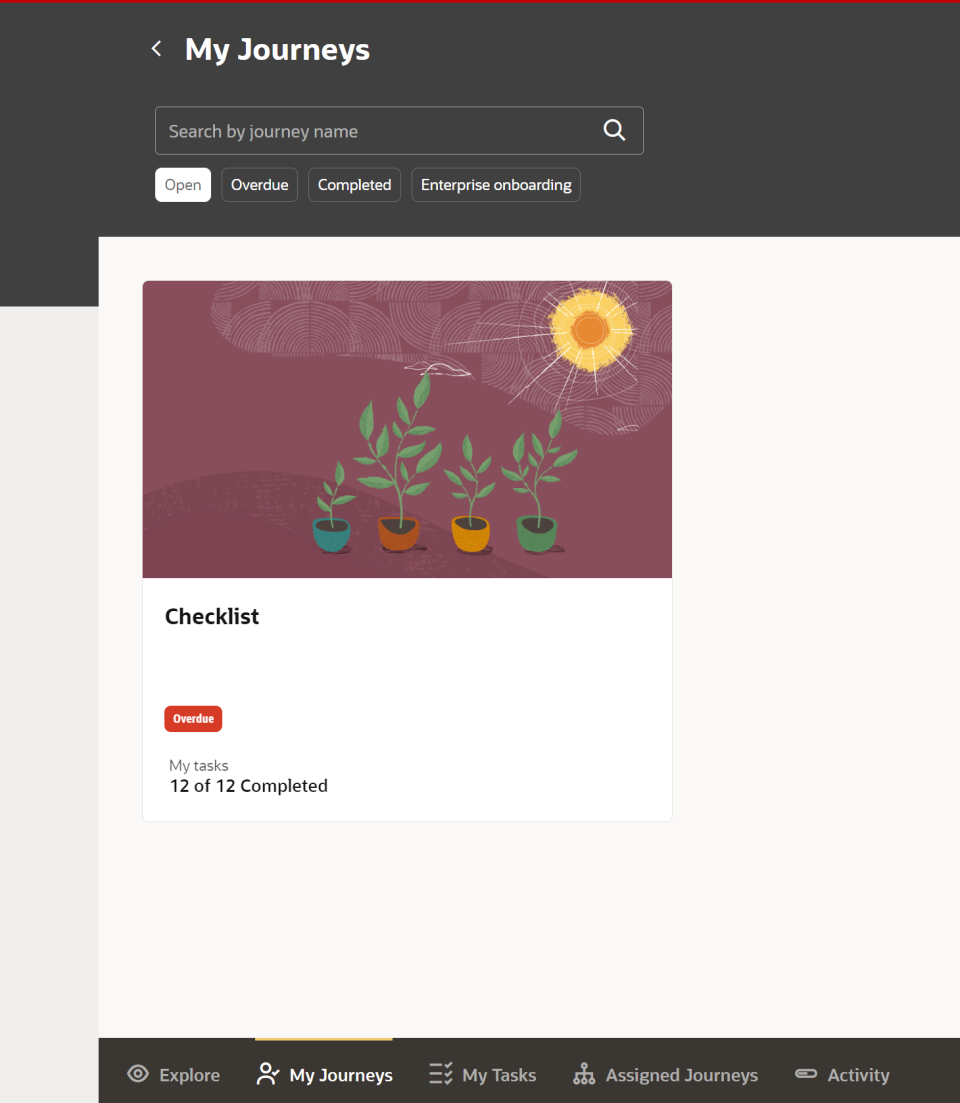
Please be sure to click into this list and complete any checklist item that is listed. If at any point you run into an issue(s) using this screen, please contact your manager/IT.
NOTE: It is important to complete these checklist(s), otherwise certain processes may not take place and could potentially affect your account.
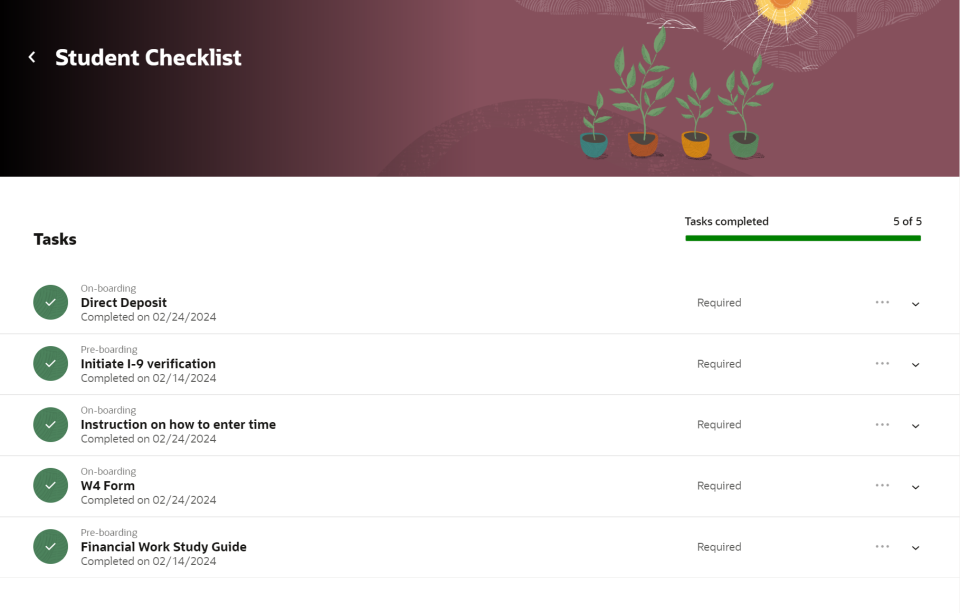
After, you find your checklist and click into it, there will be a short list of tasks to complete. Each task will redirect you to another screen by clicking the link “Go to application task”. Once each task(s) is finished return to this screen to complete.
A task that is marked “On-Boarding” cannot be completed until your first day and/or you have been moved from pending worker status to active. This is usually your first day of work.
A task marked “Pre-Boarding” can be completed before you start on your first day.
Examples of Content Items in Checklists
Time Card Guide
Time Cards must be submitted and approved by Monday at Noon. Time Cards always run the week of Monday-Sunday, regardless of your work schedule.
Enter only the hours that you worked. Do not enter time for your breaks. For example, if you took a lunch break, enter your day as two entries. One for the first half and one for the second half of the day.
The instructions below detail the process for entering time for the standard “Monday through Friday, 8 to 5” work schedule, as well as some other general information about time entry. Your schedule may differ from the schedule from this tutorial. Ask your supervisor for clarification if you have any questions about your work schedule.
Navigating to Your Current Timecard
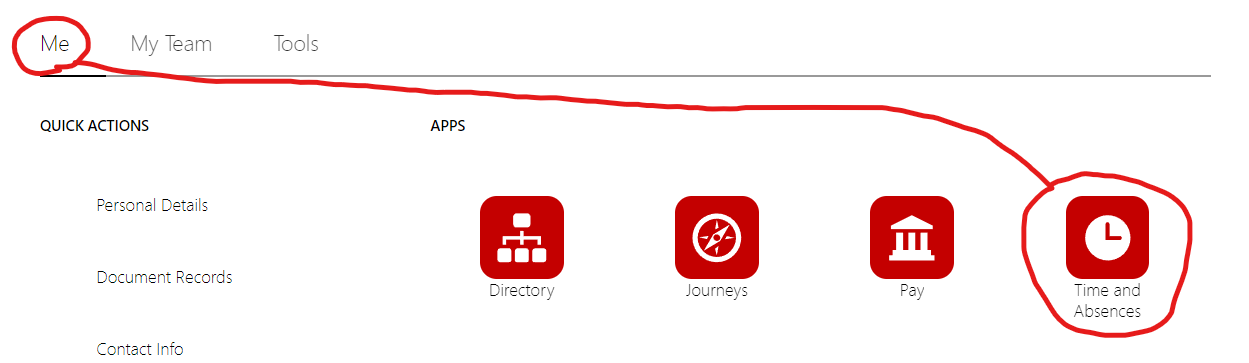
Log in to Oracle and click "Time and Absences".
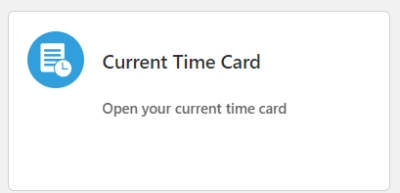
Click "Current Time Card".
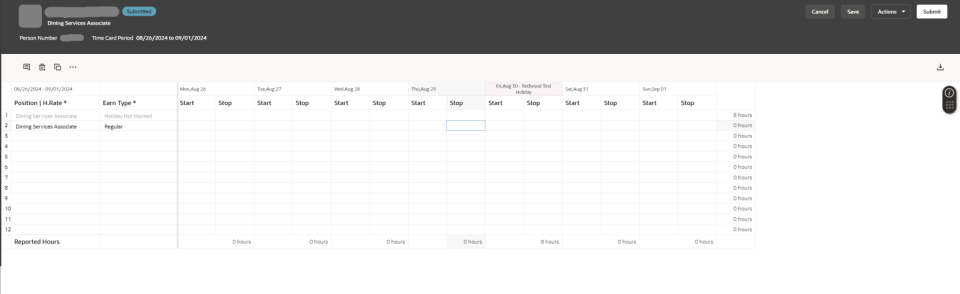
Time Card Screen
You now see your time card. It resembles a real world time sheet. You may need to make multiple lines; one for each time entry of the day. (Before lunch: 8am-12pm, and after lunch: an entry for 1pm-5pm)
⚠️Tip: Make sure you are entering all your work time on a line with the earn type “Regular”. In the screenshot above, there is a line with the earn type “Holiday Not Worked”. This will appear when you have an absence or holiday during the week, and it ensures that you get credit for the holiday or absence in your total time calculation. However, you should not enter your regular working hours on top of those lines.
Entering Time
Select the correct position under the "Position | H.Rate" by double clicking the box to see the dropdown.
If you have multiple positions specify which you are entering time for.
If you enter time for multiple positions, you may need to add additional lines.
Select "Regular" under the "Earn Type" section by double clicking the box to see the dropdown.
⚠️ "Position | H.Rate" and "Earn Type" have to be filled out for every row you have time entered!
Click into empty box under Monday, Tuesday, Etc. that says "Start" and "Stop". This is where you will enter your morning to noon shift.
Be sure to specify AM or PM.
You can enter multiple entries if needed.
⚠️ Don't forget to “Save” your time card. Your progress will be lost if you exit the screen before saving!
When the time card is properly filled out, it should look similar to the below screenshot. Notice there are separate lines for absences/holidays and the regular entries, and that there is a line for 8-12 and another line for 1-5, for a correct reporting of 8 hours for a day's work. There is also a Position and Earn Type on every line.

Correctly filled timecard example.
Do not fill out the entire time card at the end of the week. Instead, fill out your time entries on a daily basis.
Any holidays or existing absences will automatically be added to your time card.
Saving vs. Submitting
When you "Save" your time card, it will save your progress so you can come back later. Don't forget to "Save" when you are done entering time, or you might lose your work.
When you "Submit" your time card, it will be sent to your supervisor for approval. At that point, you cannot edit it. Be sure not to submit your time card until you have logged all the time you want to report. Don't forget to Submit before the deadline on Monday.
Time Card Periods - “Current Time Card” vs “Existing Time Cards”
The process for entering time for any week is the same. However, the navigation to time cards from different periods will vary.
“Time Card Periods” always run from Monday through Sunday, regardless of your individual work schedule.
The "Current" time card period will be for the most recent Monday through the upcoming Sunday. This is the time card period that will be loaded when you click into the “Current Time Card” screen. When Monday comes, last week ends and this week begins, so to speak.
To access last week's time card, you will need to click the “Existing Time Cards” button instead of the “Current Time Card” button. If you don't see last week's time card in the list, it might not have been created. In that case, you need to click the “Add Time Card” button instead of the “Current Time Card” button. When you add a time card, use the date of the “Monday” of the time card period you'd like to add a time card for.